Running Windows 11 on a Debian Host
Navigating the Build Agent Dilemma for Business Central
Developers working with Business Central are familiar with a common problem: the reliance on Windows for build agents. This dependency has been highlighted recently with Microsoft’s decision to deprecate base images compatible with Windows 10. As a result, Windows 10 now requires containers to run in Hyper-V isolation, which has a noticeable impact on the speed of building pipelines.
My personal setup for a build agent consisted of older hardware components that were cost-effective and sufficient for my needs—until now. With the new changes, this hardware is no longer up to par, especially since it doesn’t meet the requirements for Windows 11, such as the TPM module.
The Solution: Embracing Debian and Virtualization
To overcome this hurdle, I’ve decided to take a different approach. I’m removing Windows 10 from my build agent and replacing it with Debian 12. The plan is to install Debian without a user interface to keep it lean and use it primarily for virtualization with KVM/QEMU.
This setup will allow me to run Windows 11 on my build agent. Emulating TPM modules on Debian is relatively straightforward, and hardware compatibility issues are virtually non-existent. By using Debian as the underlying OS, I expect to minimize overhead and gain more flexibility for virtual machine operations such as discarding, backing up, and restoring.
Preparing the Windows 11 Image
Before diving into the Debian installation, I’ll prepare the Windows 11 image using resources from Chris Titus’s website and GitHub repository. This step is not mandatory to get a working system. However, if you limit the usage of this system to build pipelines, there will be programs installed, which you don’t need.
Chris Titus Tech’s Winutil on GitHub
With this tool you will be able to “Debloat” Windows after install, and I usually do that, but for now we will need it to create the “MicroWin11.iso” image.
The advantage of removing features directly from the image is, that that software wont even get installed. And what isn’t there at all can not get activated automatically.
DISCLAIMER: I can not guarantee that this wont lead to any issues and you need to do this at your own risk!
However, I did not have any issues with it until now, so feel free to at least give it a try. You obviously need to know what you are doing, and I would strongly recommend to limit the internet browsing on that machine to a minimum, for obvious reasons.
Now that this is out of the way, we are going to remove the windows defender! (And some other stuff while we are at it)
All you need to do is to open WinUtil and follow the instructions on the MicroWin tab:
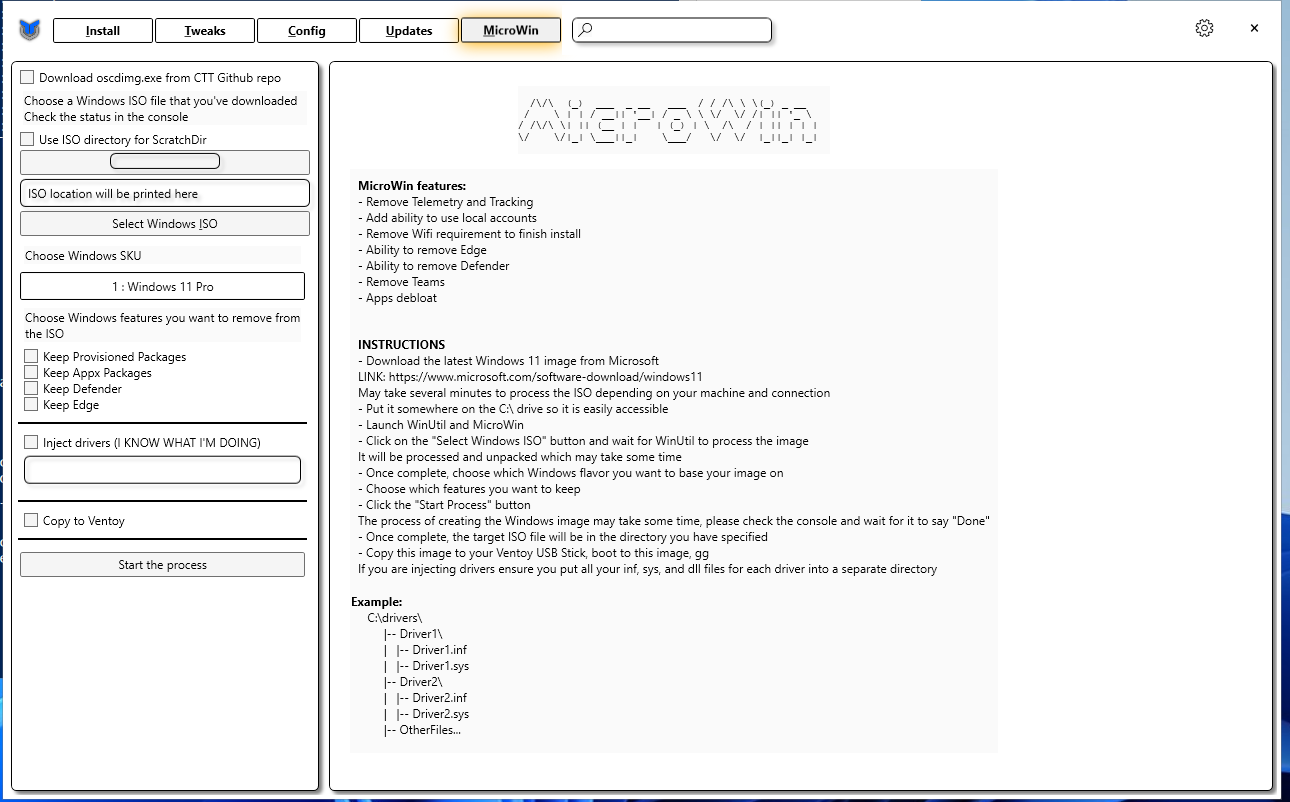 I did not “Keep” anything, and did not notice any issues.
You might also want to have a look at this guide:
Chris Titus’s Perfect Windows 11 Install Guide
Installing Debian and KVM
With the Windows 11 image ready now lets install debian.
Go to the debian page and click the big download button:
https://www.debian.org/
I can also recommend Ventoy, if you did not know this already. It basically lets you boot iso files right away without the need to create a bootable USB stick over and over again. https://www.ventoy.net/en/doc_start.html
Copy Image files
After the installation is complete, the USB drive will be divided into 2 partitions. The 1st partition was formated with exFAT filesystem (You can also reformat it manually with NTFS/FAT32/UDF/XFS/Ext2/3/4 … See Notes). You just need to copy iso files to this partition. You can place the iso/wim/img/vhd(x) files any where. Ventoy will search all the directories and subdirectories recursively to find all the image files and list them in the boot menu alphabetically. Also you use plugin configuration to tell Ventoy only to search for image files in a fixed directory (and its subdirectories).
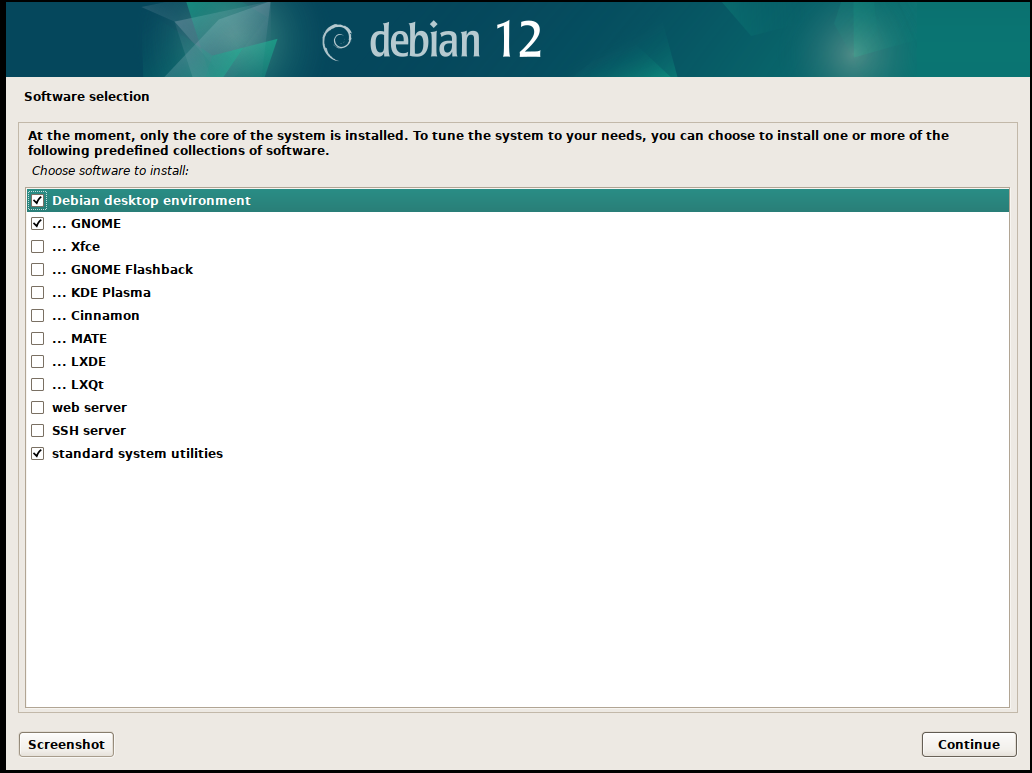
Now, that you can boot your Debian image, this is what you need to know about the install process. I used the Graphical Install option. There are some additional steps, but I only mention those steps here, where you need to adjust something.
- First you will need to set the language and location based on your preferences.
- Root Password: If you are familiar with Ubuntu, you don’t want to set a root password. That will disable the root user and will let you use
sudoas you are used to. - Next is your local user account with password.
- For the disks you can go with the first option “Guided - use entire Disk”. Select your disk. And use All files in one Partition. Finally you will need to confirm those settings. Then it will format the disk and apply the changes.
- Continue until you see this screen
 If you don’t need the UI, you can unselect
 Debian desktop environmentandGNOME, however, if you are not concerned about resources or if you are new to Linux, you might want to keep it. You can useXfceinstead ofGNOMEif you want to use the least system resource for the UI. You might want to select theSSH serverand you can unselect thestandard system utilitiesto save a bit of storage. Again, if storage is no concern for you, just leave the utilities selected.
Note: I am using the tool called virt-manager to create and manage the VMs. This requires a UI but you can connect to a different server with this tool. Its linux only, but since I have different Linux machines with an UI, I am still able to use it, even if my build agent has no UI. If that does not apply for you I would recommend to just install the UI on the build agent.
After one more continue, the system should reboot and present you with the login screen, either as a terminal or with a user interface, depending on your selection during the installation process.
To install KVM, please follow this guide. I don’t see the need to repeat the information here. https://linuxways.net/debian/how-to-install-kvm-on-debian-12/
Connecting VirtManager from the Main PC
Once KVM is installed, I’ll connect VirtManager from my main PC to the Debian build agent. I needed to run those two commands on the build agent before my virt-manager was able to connect:
virsh net-start default
virsh net-autostart default
In virt-manager go to File and Add Connection. In the windows that opens, select the Connect to remote host option.
If your Build agend has a UI installed, just skip this and use the virt-manager locally.
Setting Up a Bridge Network
This step is absolutely optional and not required to get a perfectly fine working solution. I just wanted to see if this possible. For reference, I will leave the information here that helped me to get it working.
A bridge network will make the VM appear as part of the overall network from the Debian host. Guides for setting up a bridge network can be found here:
Setting Up the VM
The next step is to set up the Windows 11 VM on KVM. This is the guide I followed. Again, no need to repeat myself here. Install a Windows 11 Virtual Machine on KVM .
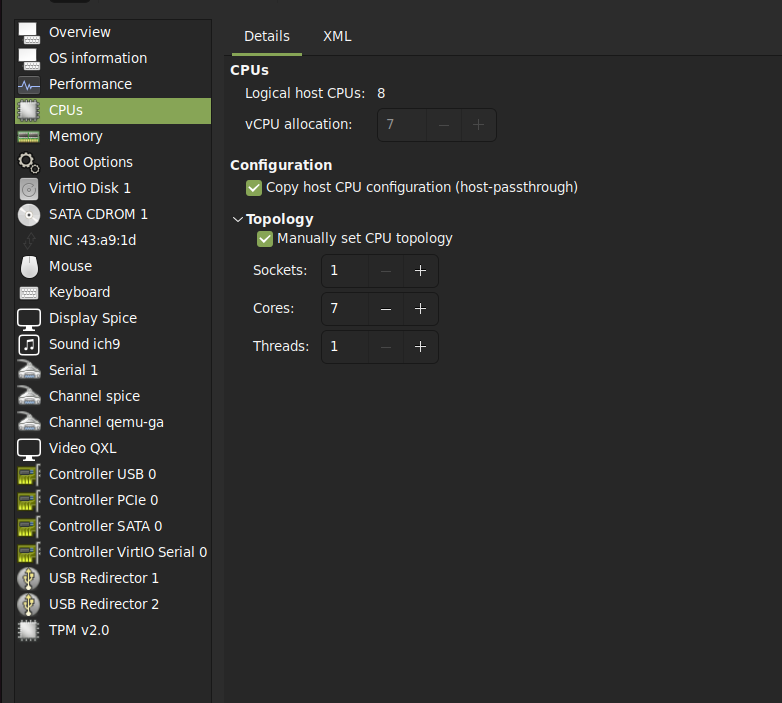
Note:
I dont remember where I found this, but it seems that windows VMs on qemu dont like the CPU setup mentioned in the guide above.
This is how my setup looks like and Windows does recocnize the cores correctly this way:
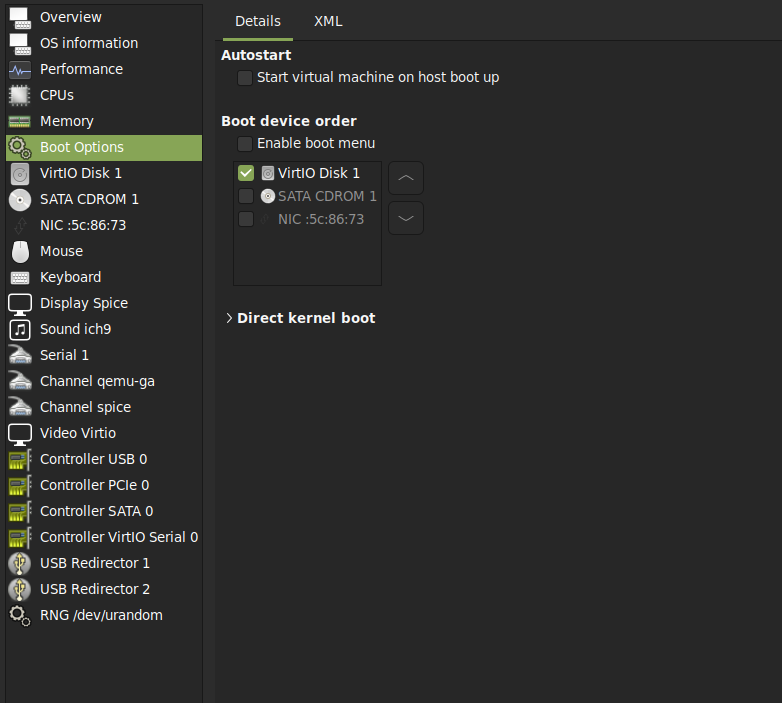
Automating VM Startup
In virt-manager, go to Boot Options and select the Autostart at the top:
Scheduling Automatic Shutdown
I want my build agent to shut down automatically at 19:00 every day. This can be achieved by adding a cron job:
sudo crontab -e
0 19 * * * /sbin/shutdown now
Setup the Windows 11 to be ready as Build Agent
As stated before, I usually use the WinUtil tool to make the system as slim as possible. I recommend you follow Chris’ guide on how thats done.
In the windows 11 setup guide, its also recommended to disable the SysMain service, so I did that as well.
After that, we need to install some prerequisites to prepare the system to run the builds for us. I followed this guide and extracted the commands for me. This is for Al-Go runners, the requirements for DevOps agent might be different. https://github.com/microsoft/AL-Go/blob/main/Scenarios/SelfHostedGitHubRunner.md#create-your-self-hosted-runner-manually
Set-ExecutionPolicy UnrestrictedNeeded to run the Scripts and commands- install Docker. I used this script https://github.com/microsoft/nav-arm-templates/blobi/master/InstallOrUpdateDockerEngine.ps1
- install choco https://chocolatey.org/install.ps1
Install-Module az -forcethis might take some time. Be patient ;)- Install some tools using choco
choco install 7zip
choco install gh
choco install pwsh -y
choco install vcredist140 -y
choco install dotnet -y
choco install dotnet-sdk -y
choco install dotnet-6.0-sdk -y
- restart your powershell to reload env variables
- Run the next set of commands
dotnet nuget add source https://api.nuget.org/v3/index.json --name nuget.org
dotnet tool install --global AzureSignTool --version 4.0.1
Add-WindowsCapability -Online -Name OpenSSH.Server~~~~0.0.1.0
Start-Service sshd
Set-Service -Name sshd -StartupType 'Automatic'
Install-Module bccontainerhelper
Import-Module bccontainerhelper
Check-BcContainerHelperPermissions -Fix
That should leave you with a prepared system to run business central builds on it.
Now follow the remaining steps in this guide to install the runner its self on the machine and you should be good to go. https://github.com/microsoft/AL-Go/blob/main/Scenarios/SelfHostedGitHubRunner.md#allow-your-repository-access-to-your-runners
Conclusion
By switching to Debian and utilizing virtualization, I aim to create a more flexible and efficient environment for my build agent. This approach should circumvent the limitations imposed by the recent changes to Windows 10 and the hardware requirements of Windows 11, allowing me to maintain a productive pipeline for Business Central development.